How do I create and publish my first event?
Go to Events, tap Create event, fill in the form and tap Publish. Your event page goes live at once.
- Go to Events and tap Create event.
- Under Basics, add a Title, a Category and a Description.
- Under When and where, set Starts, Ends (optional), the Time zone, the Venue and the City.
- Add a Poster.
- Under Tickets, add at least one ticket type with a Name, a Price and a Quantity. Use Add ticket type or Add free ticket for more.
- Tap Preview to see the event as fans will.
- Tap Publish, or Save draft to finish later.
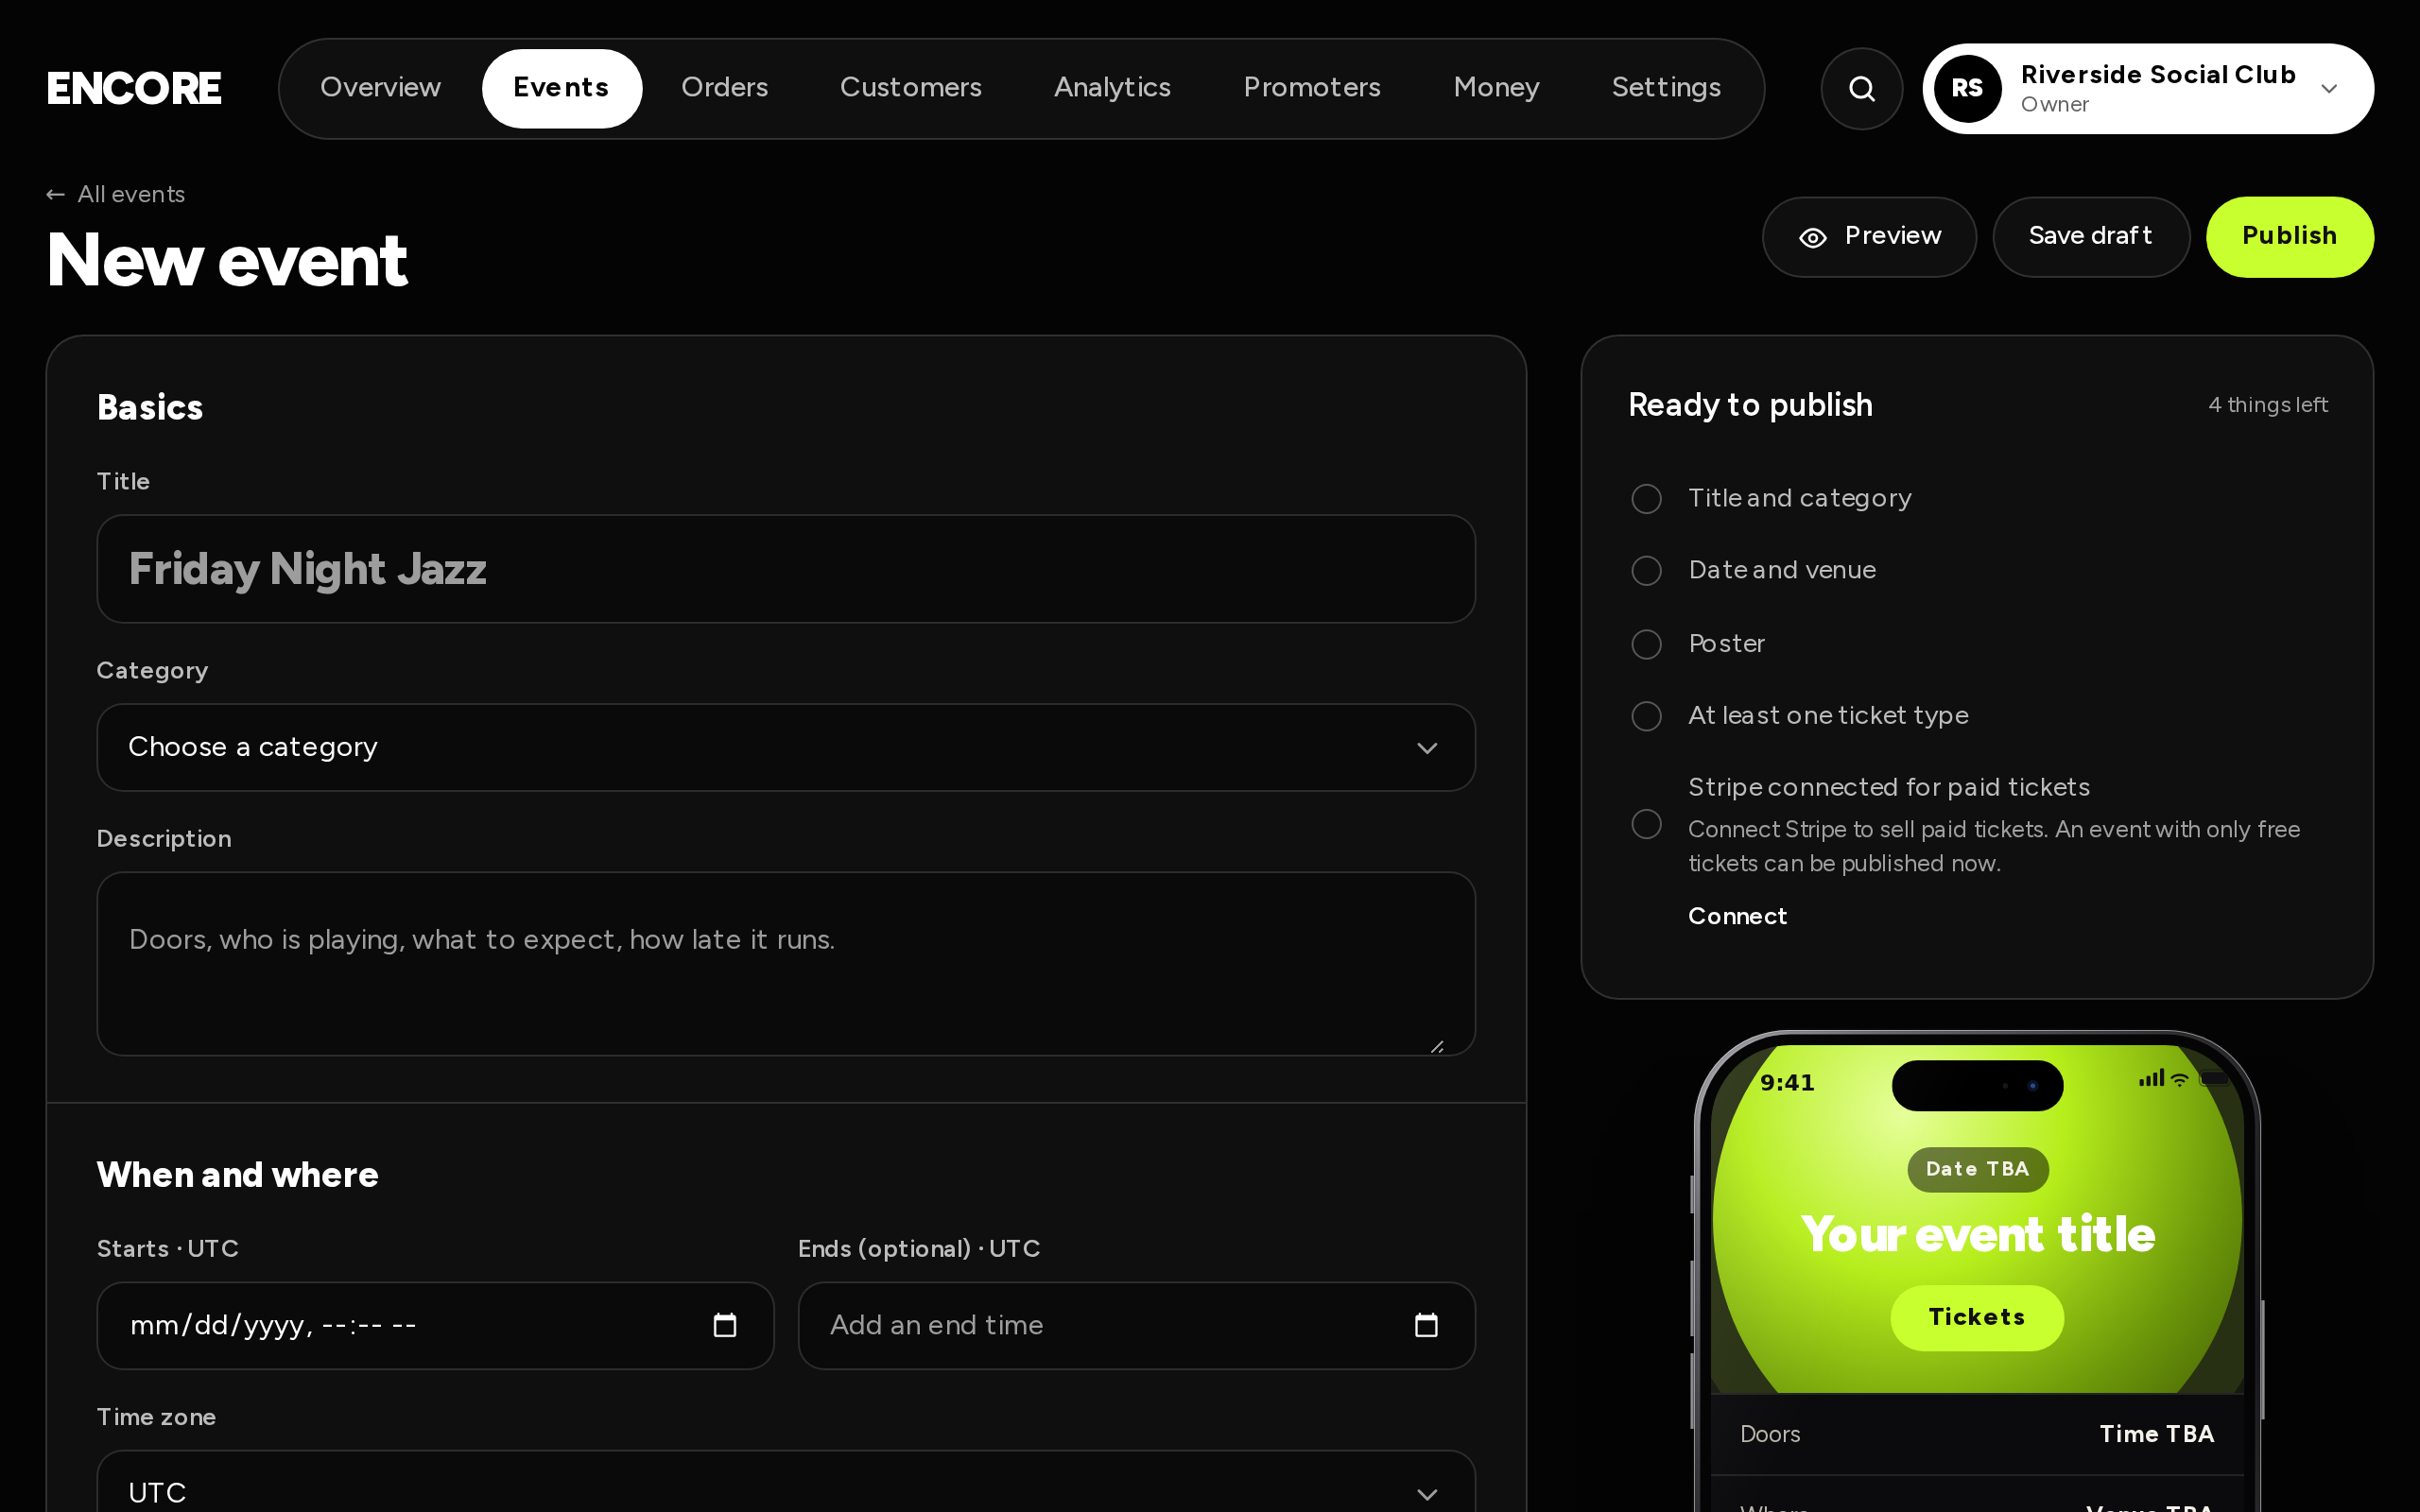
The checklist beside the form shows what's still missing: Title and category, Date and venue, Poster, At least one ticket type and Stripe connected for paid tickets. Until Stripe is connected, that last line says "Connect Stripe to sell paid tickets. An event with only free tickets can be published now."
Before you can publish paid tickets
An event with a paid ticket can't be published until payouts are set up with Stripe. The form says "Publish is held until Stripe is connected, because this event has a paid ticket. Free events and drafts are not affected." See Set up payouts with Stripe.
After you publish
Your event has its own page. Changes you save show on that page right away. Share the link, or sell on your own website.
Only the owner and admins can create and edit events. Door staff can't.